Notre site dispose désormais d'un mode éco. N'hésitez pas à l'essayer !
Notre site dispose désormais d'un mode éco. N'hésitez pas à l'essayer !
Learn how to add custom user definitions in Google Analytics 4 (GA4) to better analyze the behavior of different user roles in WordPress. Understand the importance of tracking WordPress user roles to enhance your reports and gain deeper insights into user actions.
Understanding and analyzing user behavior is a crucial aspect of digital marketing. However, user actions are often analyzed as a whole, even though traffic consists of different types of users (customers, non-customers, administrators, etc.). To add more granularity to reports, web analytics solutions, including Google Analytics 4, offer the option to create custom “user definitions.” These properties allow you to qualify each user, making your reports more actionable.
In this article, we will focus on adding a "user definition" that can be useful in many cases: the role of the user on WordPress.
The idea is to associate each site user with their WordPress role. This way, in our reports, we can isolate “customers” and obtain reports specific to the activity of users with a customer account, or conversely, isolate non-customer users.
On WordPress, different roles can be assigned to site visitors. These roles indicate whether the user is a guest (not logged in), an existing logged-in user, or even an administrator.
Depending on the role assigned to the user, the events generated during a visit will have a different impact on the site's performance. For example, if you have an event corresponding to adding a product to the cart, it might be interesting to know whether the action was performed by an existing customer, a visitor, or an administrator performing tests.
Beyond this example, tracking a WordPress user's role can bring numerous benefits:
We have mentioned guests (non-logged-in users), customers (logged-in users in the context of an e-shop), and administrators. However, depending on your WordPress configuration, the extensions you use, and the industry you operate in, other roles may be present.
Here is an overview of the different WordPress roles:
The first step is to create “user definitions” in GA4. To do this, simply go to Admin, then to “Custom definitions.”
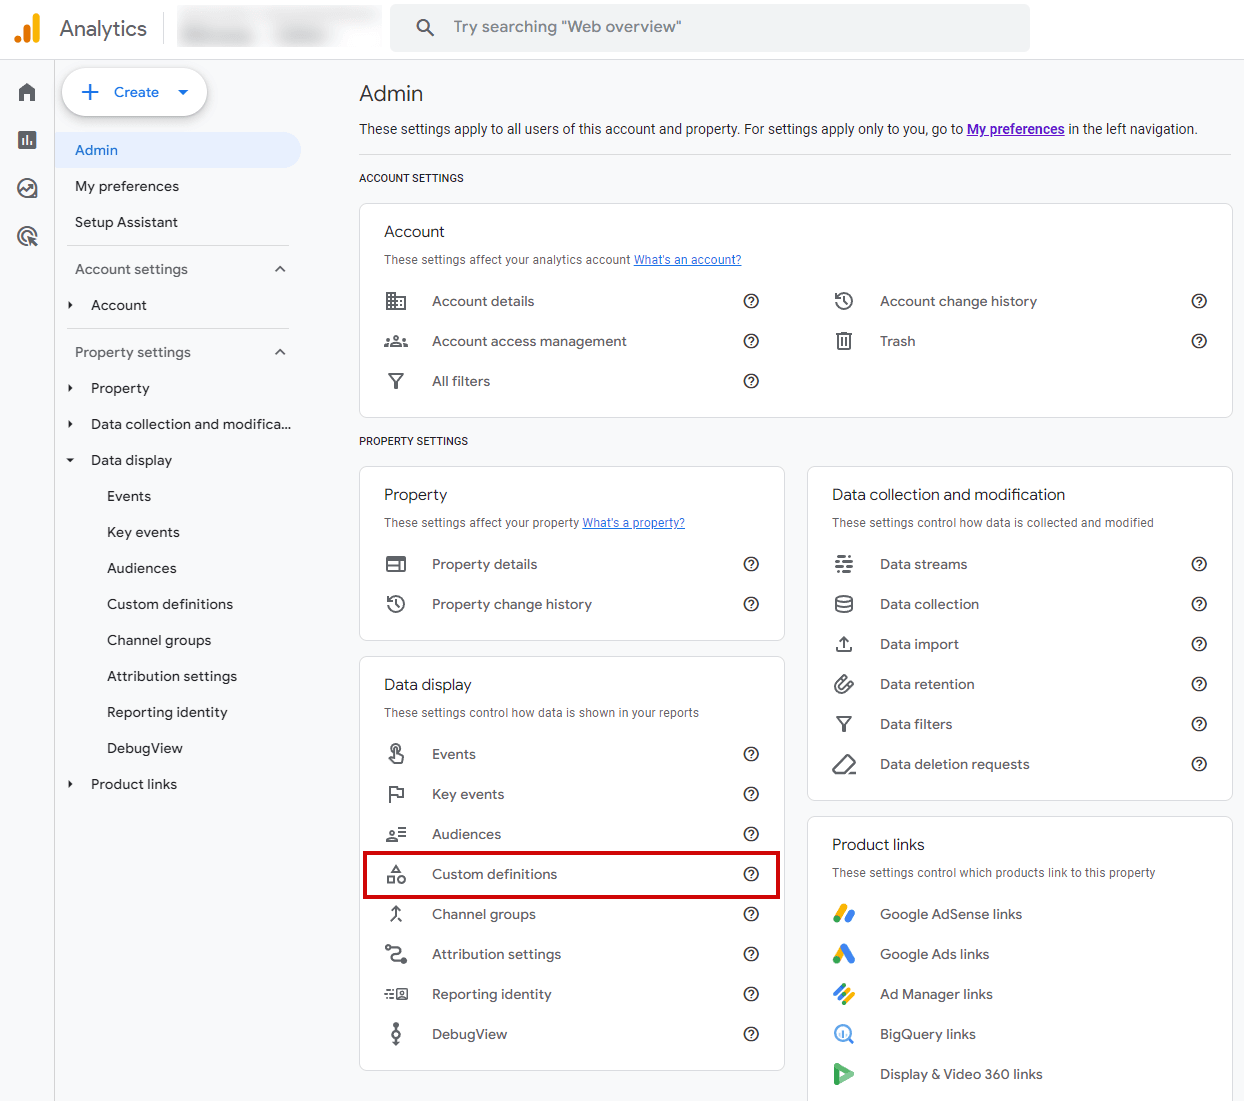
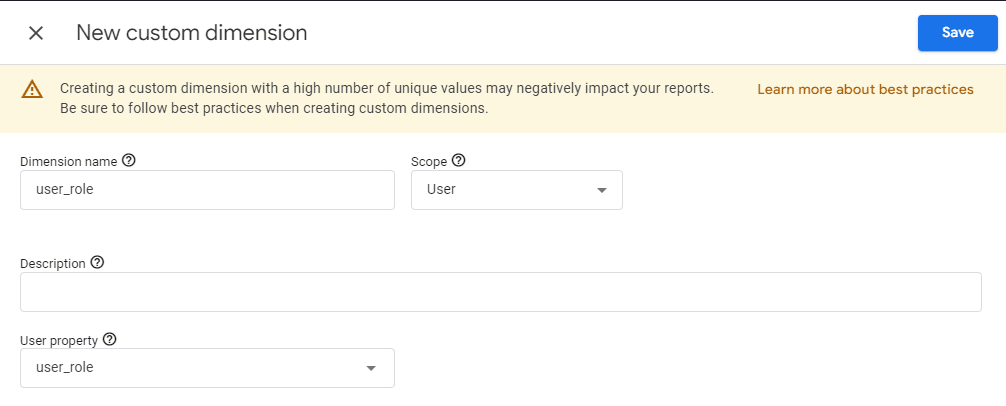
Next, click on the blue “Create custom dimension” button. Here, you will need to specify several things:
On WordPress, there is a “logged-in” class that is added to the < body > classes when the user visiting the site is logged in. Thus, we can easily send this information to GA4 via the DataLayer.
Before doing this, we will also add a specific class related to the user's role to have it in the < body > classes as well.
To do this, go to the functions.php file of the WordPress theme you are using, then add these lines:
// Function to add the user's role class to the body
function add_role_to_body_class($classes) {
    // Check if the user is logged in
    if (is_user_logged_in()) {
        global $current_user;
        $user_data = get_userdata($current_user->ID);

        if ($user_data) {
            $user_roles = $user_data->roles;

            // Loop through the user's roles
            foreach ($user_roles as $role) {
                // Add the corresponding role class
                $classes[] = 'role-' . $role;
            }
        }
    }
    return $classes;
}
add_filter('body_class', 'add_role_to_body_class');
Now, when a “customer” is logged in on the site, a “role-customer” class will be present in the < body > tag.
Now that the user’s role appears in the < body > tag, we will create a JavaScript function to retrieve this information and transmit it as a “user definition.”
In this code (using the jQuery framework), we first check if the user is logged in. If not, we assign the “guest” role to the user.
If the user is logged in, we retrieve the “role-*” class present in the body and add the role to the custom definitions that are transmitted.
if($('body').hasClass('logged-in')) {
    var user_logged = true;
    var user_role_class = $('body').attr("class").match(/role-[\w-]*\b/);
    var user_role = user_role_class[0].replace('role-', '');
} else {
    var user_logged = false;
    var user_role = 'guest';
}
dataLayer.push({
    "user_logged" : user_logged,
    "user_role" : user_role
});For these two user definitions to be assigned to each page view, we need to integrate them into the Google Tag Manager (GTM) tag that manages GA4.
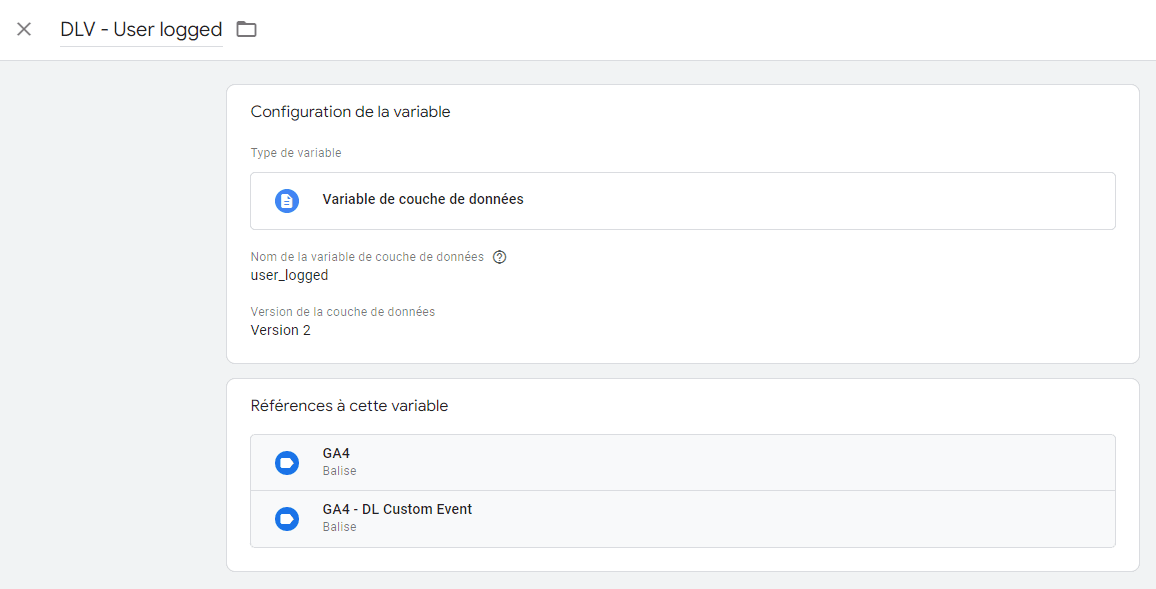
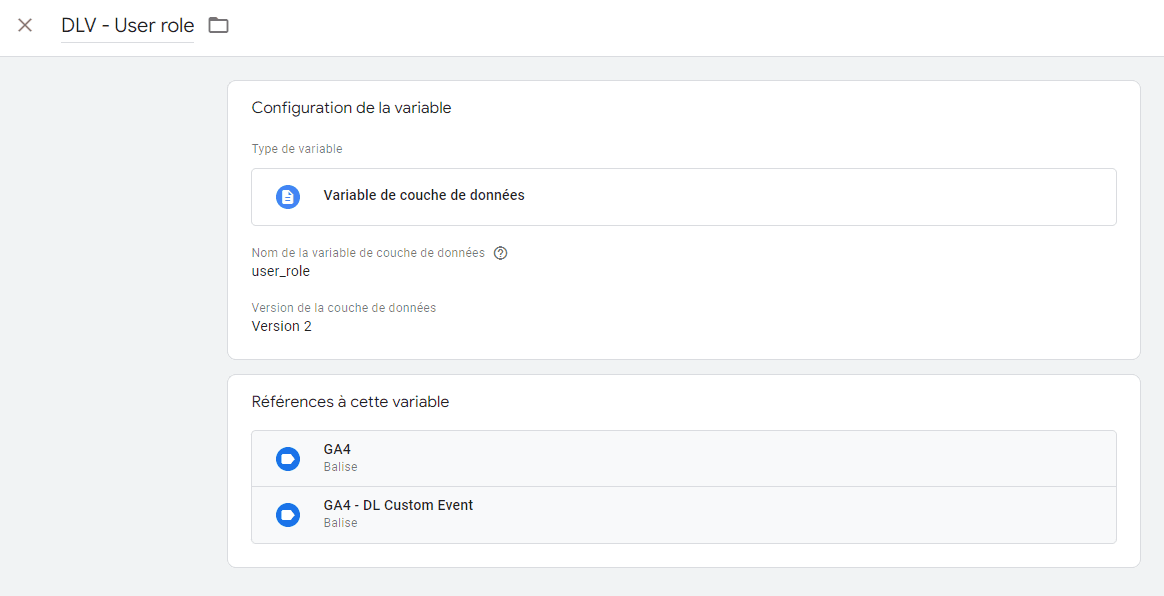
First, go to GTM, then to “Variables” to create these two variables:
Next, go to the “Tags” tab and click on the GA4 tag. In the “Configuration Settings” section, add the two user definitions, like this:
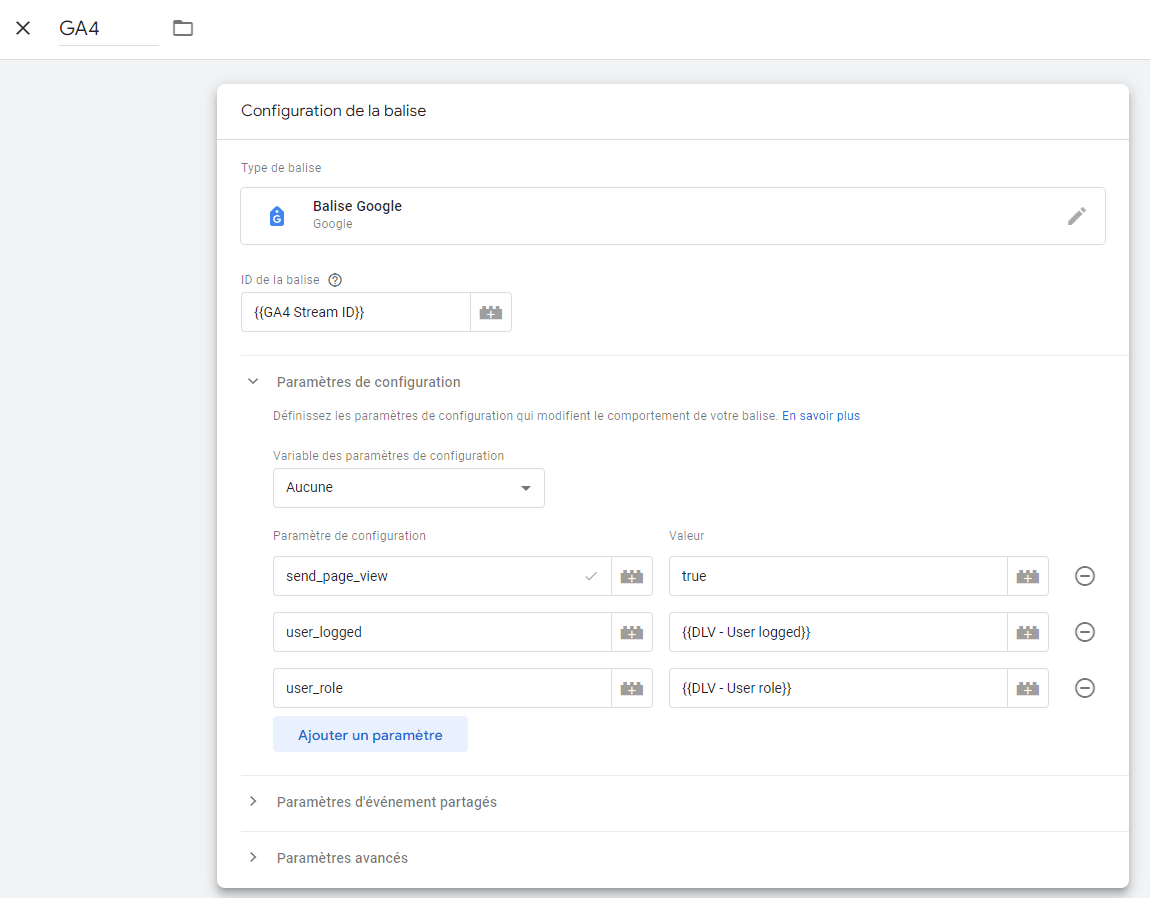
Now, the “user_logged” and “user_role” user definitions will be populated for each user. As always in GA4, you will need to wait because the data will only be visible the next day.
After this delay, several options are available for using these user definitions.
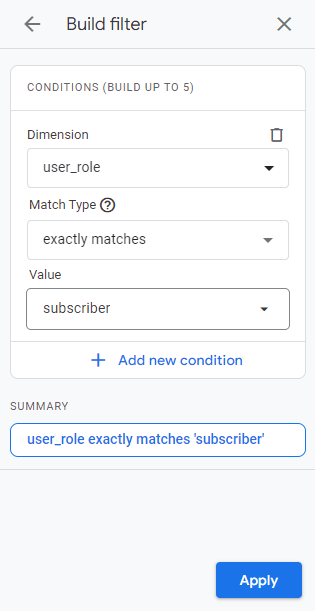
In any GA4 report, you can add filters. These will allow you to keep only one type of user or, conversely, exclude them.
To do this, go to a GA4 report, then click on “Add Filter.”
In the drop-down menu “Dimension,” select “user_role.” Then choose the user_role(s) you want to keep in your filter.
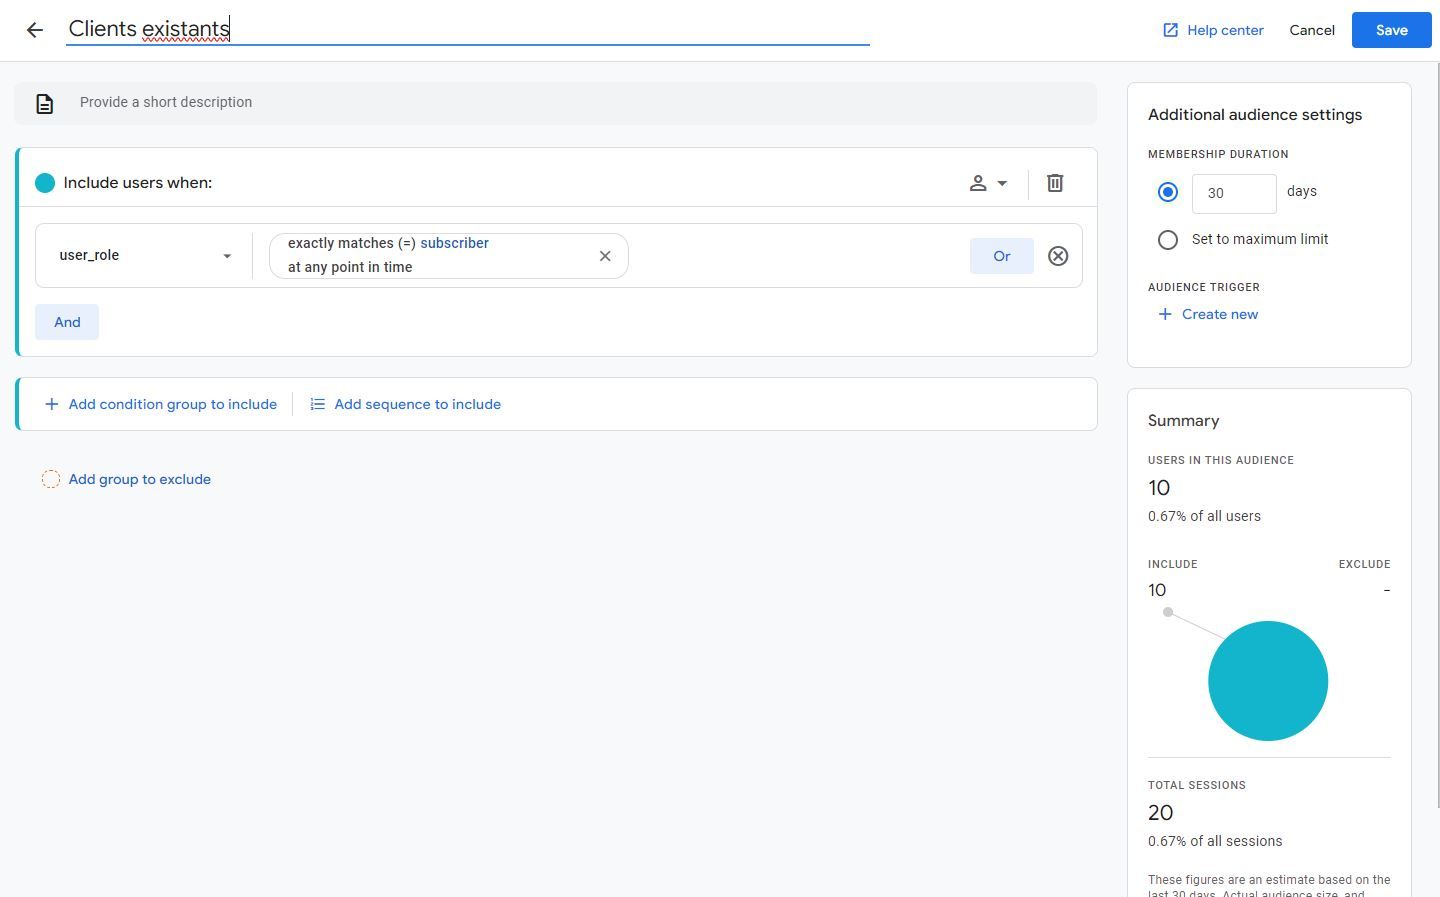
Creating audiences for each of your WordPress roles can be a good way to group existing customers and non-customers. This way, your audiences can be used for remarketing while excluding customer users.
Conversely, you can also create a remarketing campaign targeting only your site’s customers.
To create a custom audience, go to Admin, then Audiences. Click on “New Audience,” then on “Create a New Audience.”
To visualize the distribution of users based on their roles, you can use Google Looker Studio. The tool also allows you to create filters to isolate certain roles in your reports.
To start, go to your Looker Studio report. To be able to use the recently added user definitions, you will need to update the data source.
To do this, go to Resource > Manage Added Data Sources.
Select the GA4 source by clicking on “Edit,” and at the bottom, click on “Refresh Fields.”
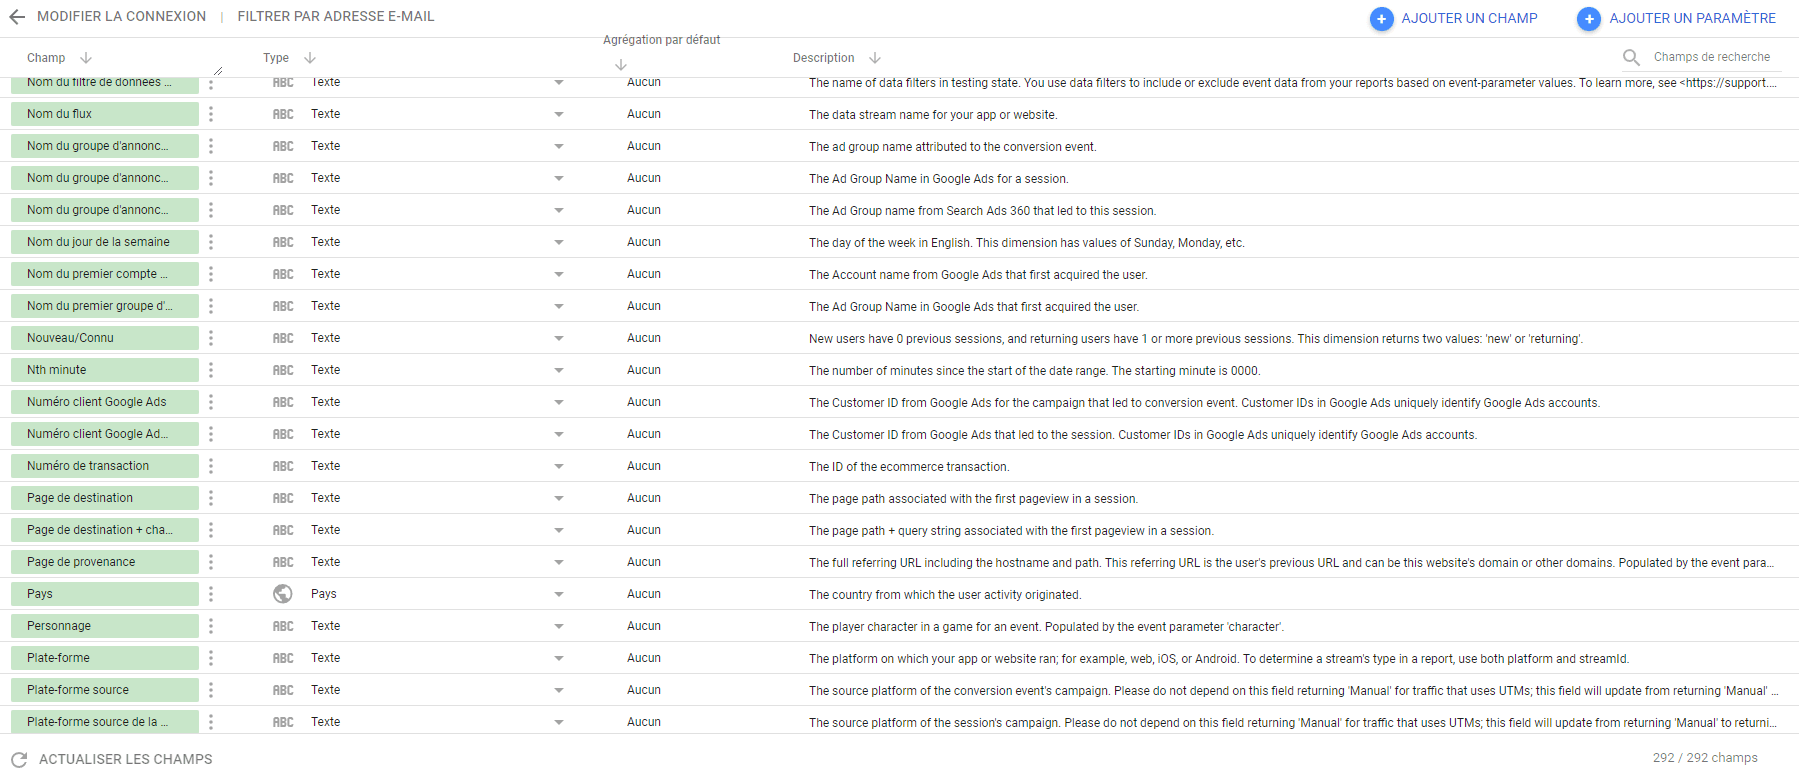
The custom definitions “user_logged” and “user_role” are now available in your reports.
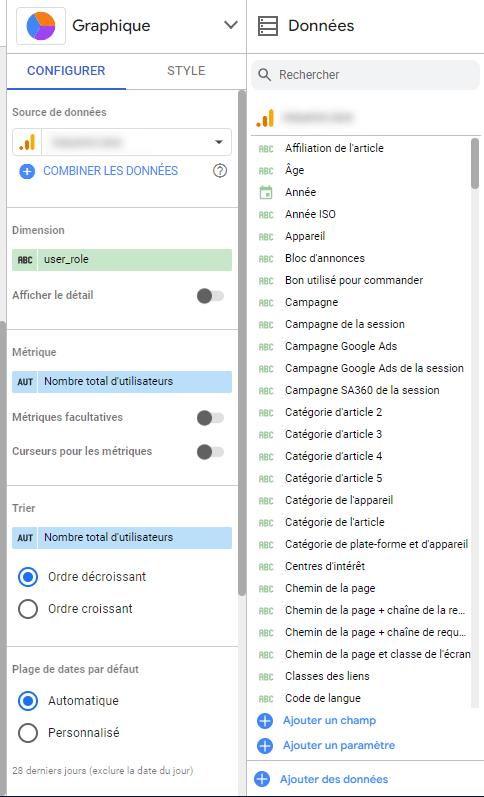
Now, you can return to your Looker Studio report and create a “Pie Chart.” The “user_role” dimension will be available in the “Dimension” section.
These are just examples, but feel free to use these user definitions in filters for your charts, create segments in GA4 to filter your reports more easily, and many other possibilities.
Maximize the efficiency of your tracking by entrusting it to our team of experts. Contact us for a customized solution and boost your performance.